![]()
3D Model Course Designing with 3dStudio Max
Tutorial 5
When making full 3d Model courses, some surfaces objects must be named to a certain naming convention. These include the default Plane, Reflective surfaces and Cutouts.
Naming convention: The GGS renderer must be able to identify certain object types in order to take appropriate action.
All reflective surface objects must have their name start with the string "Reflect" eg "ReflectPond1", "ReflectStream4" etc...
The main Plane must be named "PlaneM"
All cutout objects must either be deleted before hand or have their name start with the string "Cutout" eg "CutoutGreen", "CutoutSandBunker1" etc...
According to the object naming convention, GGS will either automatically overlay these surfaces or, in the case of Reflect, activate the reflection process for the object or, in the case of Cutouts, not render at all. This method is used so that you don't have to spend more time aligning surfaces to one another. The default Plane is rendered 1 unit below all other surfaces while Fringes and Footpaths are rendered 1 unit above the normal height.
default Plane : Level -1
All other objects : Level 0
The GGS renderer will, therefore, Overlay the Plane (normally HiRough) with all other objects,
Step 1 Complete all the surface objects for the course including the fairways, rough, sand bunkers, tee boxes, pond banks etc etc ... using the previously described methods.
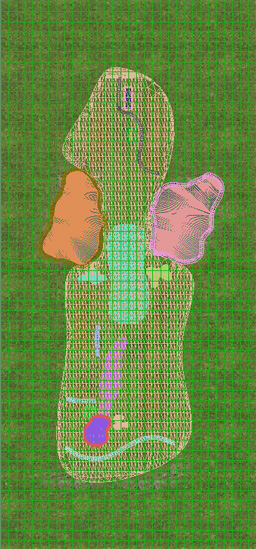
The above image shows all the surfaces required for the course hole.
Note how the grass rough area completely covers the fairways, sand bunkers, footpaths and the green. The GGS renderer will automatically ensure that these surfaces appear though.
Step 3: Loading the height map
Up until now all surfaces have been flat surfaces. When using Surface Overlays the terrain height in GGS is determined by the gray scale height map so they can stay that way.
With full 3d Models you have the option to integrate the terrain height (Z plane in a Model) within the model. You can also import any existing gray scale height maps into the model.
If you are not going to change the contours within the model then loading the height map into the model is optional. GGS will load the gray scale height map if the model is flat anyway.
I'm assuming you already have a contour gray scale height map of course. If not then you can make all the contours from scratch from within the model. You'll have quite a bit of work cut out for yourself though. Compared to using air brushes in Photoshop to paint the contours in a gray scale map, making the contours directly within the model's geometry is very time consuming. This, however, is the only way to exactly model your terrain.
If you have GPS terrain data of the course you are modeling then use a tool to create a gray scale or 16 bit high resolution bitmap from this data.
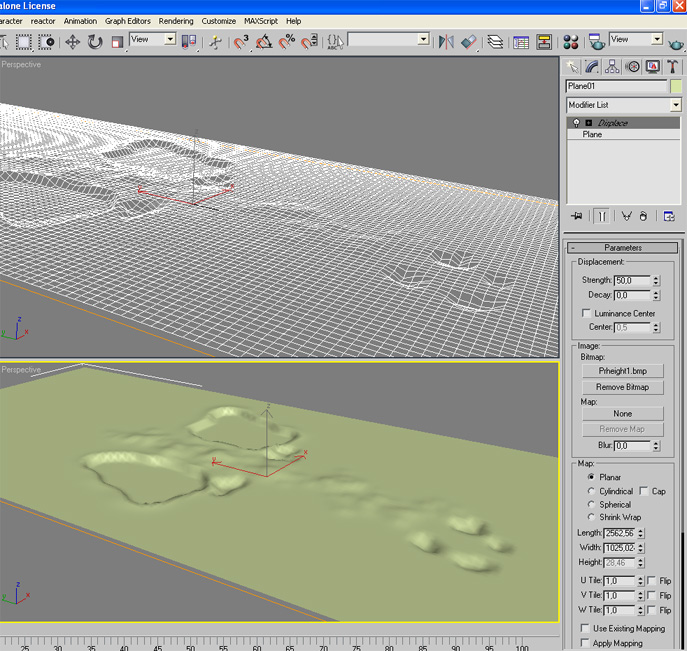
If you do have a height map then this is how to import it into the model:
1. Select all the surfaces including the plane (press H and select All)
2. Select the Displace modifier from The Modifier List rollout.
3. Press the ("None") Bitmap button and select the height bitmap file
4. Set the Strength to 50 ( or any other appropriate level).
Your model should then look something like the above.
Whether or not the GGS renderer will actually use the Z plane is user optional. If you feel more comfortable modeling the course hole with the terrain displacement instead of just flat surfaces, but you don't want the GGS renderer to use it, then this is possible. The below described file image convention controls this.
Step 4. Export the model to .3ds format.
After saving your work in the standard .max format, go to the File/Export menu item. Browse to the GGS Courses folder and select your course folder.
Once again, there is a naming convention so that GGS can detect if the model exists and automatically load it.
For full surface models the naming convention is XXTerrain*.3ds where XX is the first two letters of the course name and * is the hole number (0 for driving range). eg PrTerrain4.3ds for the ProTee course Hole 4.
GGS will have to somehow know if the model includes the height (Z) plane and that you want GGS to use it instead of loading the gray scale map. This is accomplished by adding a Z to the XXTerrain*.3ds file naming convention.
eg PrTerrainZ4.3ds for the ProTee course Hole 4.
That's it!
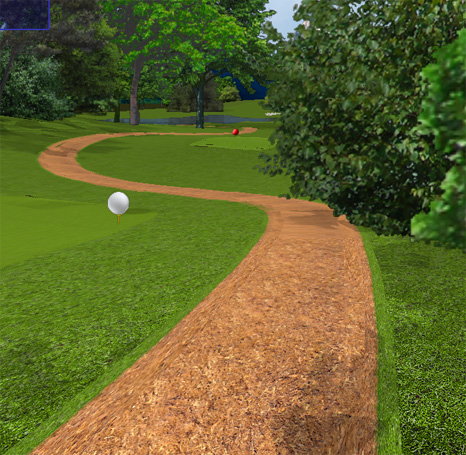
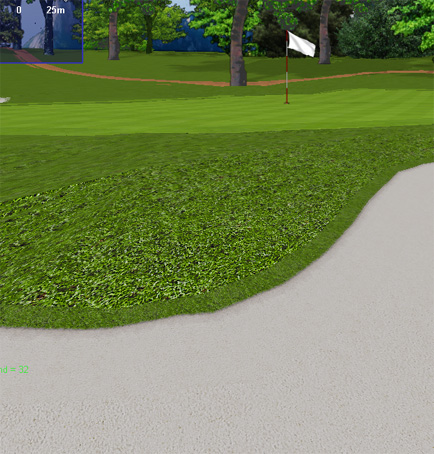
The two screen shots above show the increase in the level of detail compared to the single large texture map method.
You also get a 50% increase in rendering speed plus faster loading time.
 Home
Home Sensors
 Cameras
 Software
 Enclosures
 GSA Courses
 E6 Courses
 Business
 Tech News