![]()
![]()
![]()
ProX Water Reflect Map Modeling
3d studio Max 8 method
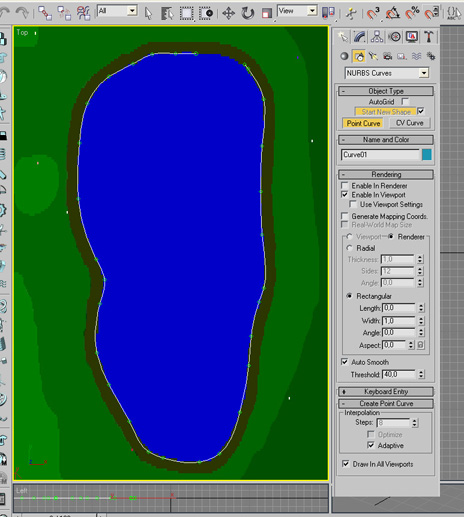
Compared to the MilkShape method, this is simplicity itself. Problem is 3D Studio Max is a $3000 professional graphics tool. If you happen to have a version lying around though then this is how to make a the reflection maps with it:The image has to be scaled and positioned before any work can start. To do this create a plane object the same size as surfaceObjects image (ie 1024 * 2048) set around 0,0 (center) co-ordinates. With the Lock Zoom/Pan off in the viewport background window (alt/B) zoom in/out so that the plane matches the surfaceObjects image. Set the Lock Zoom/Pan option On and delete the Plane object.
Then select Modify and from the List select the Extrude option, Set Ouput to Mesh and it's finished.
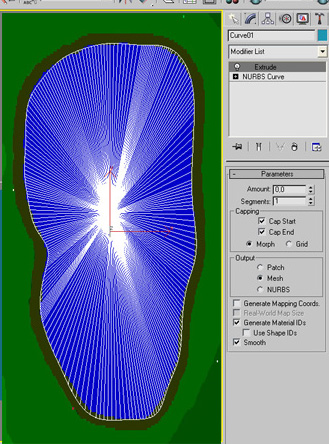
In the Capping box you can select Morph or Grid. The above shows the polygons generated with Morph capping.
This, however, is not optimal because too many polygons are generated.
A better method would be to select Grid capping.
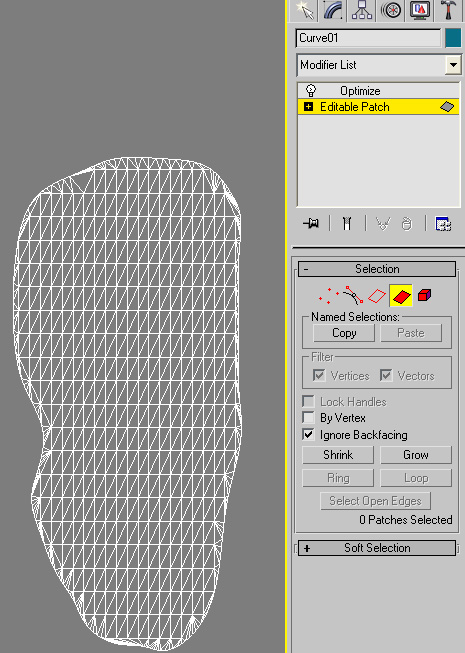
Here the result of using the Grid capping option and then converting to an editable patch
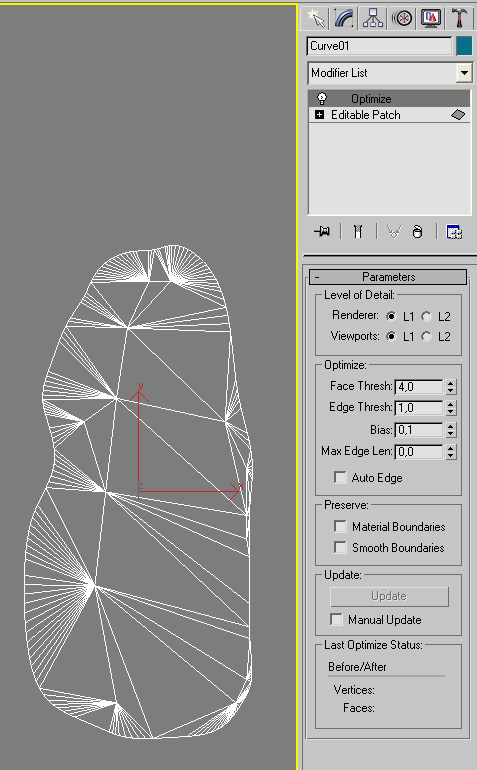
After applying the Optimize modifier the number of polygons have been reduced substantially.
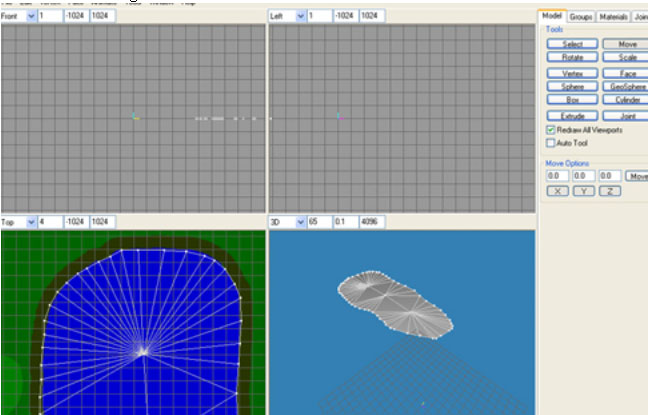
With this step finished we now have to remove the backfaces. To do this select the Bottom view and using the Patch Selection in the Editable Patch window with the Ignore backfaces on, select all faces by dragging the mouse around the object and then press the delete key. When you switch back to the Top view you should see that all the polygons are still visible.
Moving Wave / Water Ripple Effect
To activate the GGS Pro-X moving wave / water ripple feature you simply have to assign a UVW map to the reflection object and assign a suitable texture.
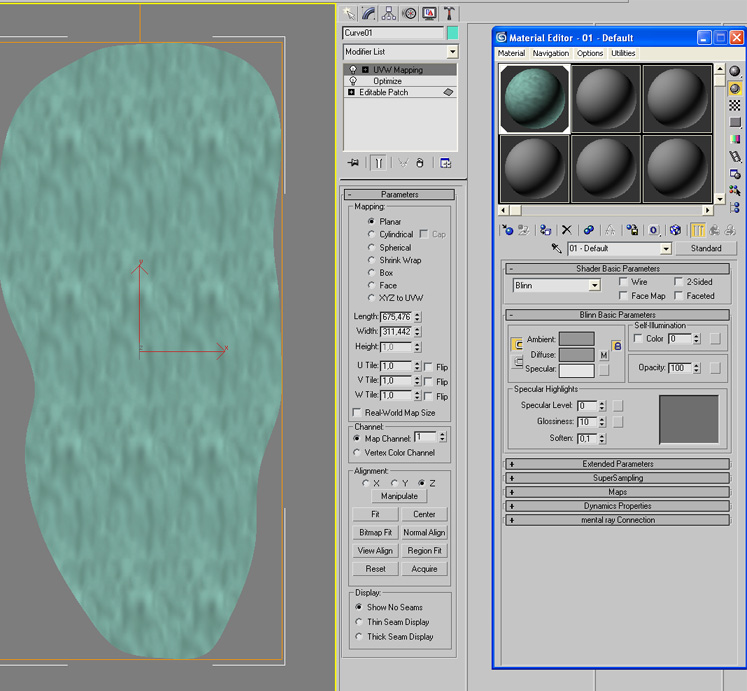
In 3ds add a suitable water wave texture to the Material Editor and apply a UVW Map to the reflection object from the Modifier List. The texture must be placed in the Courses/Textures folder. Assign the new texture to the reflection object and set the UV Tile appropriately. This is normally the default 1.0 but if you want more waves increase this factor.
Export to 3ds format with the following naming convention..
Note 1: Because the reflection model already contains it's position data you don't have to position the reflection model in ProX.
Note 2: Because the ZY planes in the 3ds model are the reverse of GGS 3d co-ordinate system, the system must be able to detect this. This is done by adding a "Z" to the file name.
Note 3: If you have more than one water pond or stream in one hole and they are all at the same ground height then you can create objects for all of them in one single model.
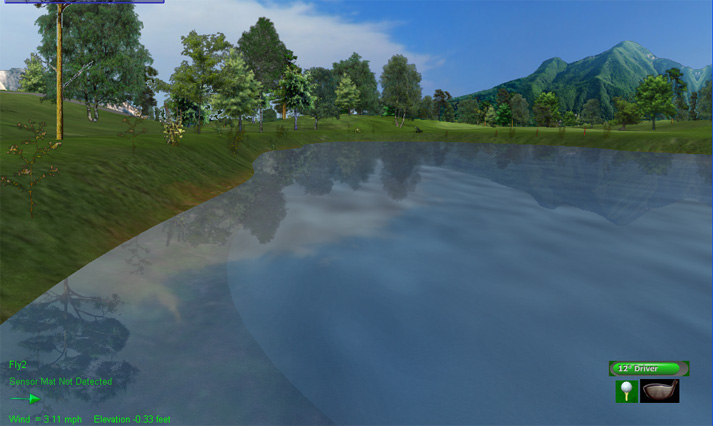
After you have loaded the hole in GGS, press ctrl/R to go into Reflection Model mode which allows you to fine adjust position, height, rotation and scale. Go to the Water Mode (ctrl/W) to adjust colors and translucency.
ProX Water Reflect Map Modeling
with MilkShape
You can download MilkShape from www.MilkShape3d.com
To create the reflect models in MilkShape do the following:

When you load the hole in GGS it will detect that a reflect model exists and wont do the old reflect rendering so that any ponds without reflect models wont have any reflection.
After you have loaded the hole in GGS, press ctrl/R to go into Reflection Model Positioning mode.
In this mode you can position the reflect model, set its height, rotate and scale.
GGS can manage up to 4 reflect models per hole which you select with the page up/down keys. The current reflect model will be displayed in red while others will be displayed in blue.
When first loaded the reflect model will appear at the front of the hole. Use the arrow keys to position the model over the water pond. Press Esc key to move camera to the pond if too far away.
Press ctrl/R again and follow the instructions in the window to scale and set height. Height is very important and has to be set 2 or so units above the water level to make a reflection.
It is also important that the pond level height be uniform otherwise parts of the reflection will be missing.
If the reflect map doesn't fit exactly then you have to modify the reflect model accordingly in MilkShape.
Pond Beds
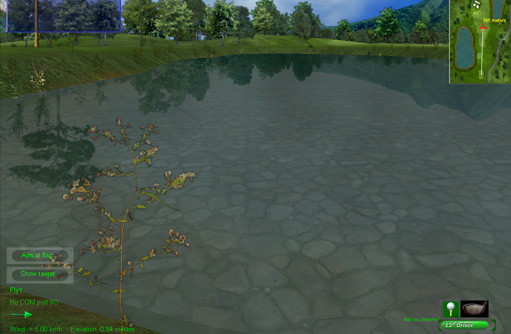
An optional pond bed for each water area can be activated in the Reflection positioning mode. This prevents grass textures appearing in the water when the water translucency is set high.
Water color and translucency
Press ctrl/W to goto to Water color mode. Here you can adjust the colors and translucency of the water itself, the pond bed and the tree, sky and panorama reflections.
 Home
Home Sensors
 Cameras
 Software
 Enclosures
 GSA Courses
 E6 Courses
 Business
 Tech News