
![]()
3D Model Course Designing with 3dStudio Max
Tutorial 3
![]()
Step 7. Applying a material texture to objects.
Before we can apply a texture material we first have to create a suitable texture material. This is done in the Material Editor.
Press the 'M' key to open the Material Editor.
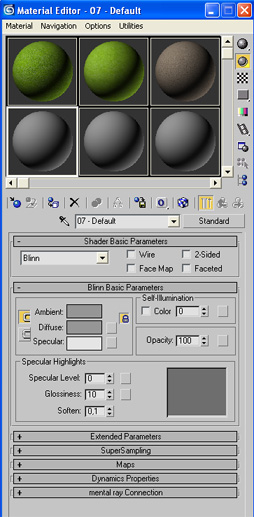
Step 1. Press the 'M' key to open the Material Editor.
Step 2. Select an empty material window at the top of the Material Editor ( that's the gray ones).
Step 3. In the Bin Basic Parameters roll out there's a Diffuse edit box. Press the small gray button to the right of this and the Material/Map Browser will open.
Step 4. Select Bitmap form the list and press OK. The Select Bitmap Image window will open.
Step 5. Browse and select the appropriate bitmap image.
Note: These texture images have to be created before hand and must be stored in the GGS Courses/Textures folder.
Step 6. Rename the 0x-Default name to an appropriate name for the material in the top combo box (in this case 07-Default to Green) by typing directly into the combo edit box. (select the Standard Material before hand if not already shown by opening the combo box and selecting the Default name in the roll-out).
Step 8. Assign the material to the object.
This is simply done by dragging the material over the object in the view. (Note: You may have to move the Material window to see the object).
Step 9: Texture mapping. The nice thing about 3d Model surfaces is that we can map the textures to it anyway we like.
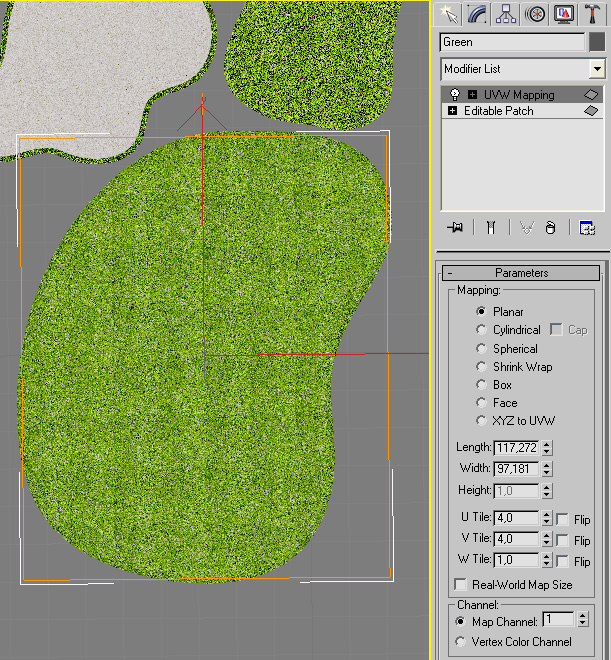
We've assigned the texture material to the object but not told the system how we want it mapped. In our case this is normally just a case of scaling the texture material so that it looks right.
To do this, select the UVW Mapping from the Modifier list (as with the Extrude modifier option previously) and set the U and V Tile values to a suitable value. If you have the top viewport open and have set its View parameters to Smooth+Highlights (right click on top right hand corner) then you can immediately see the results of the tiling.
Using the UnwrapUVW modifier
You can make additional modifications to the UV mapping in the UnwrapUVW modifier. These include scaling and rotating.
To scale this way open the UnwrapUVW modifier and press the Edit button in the Unwrap UVW rollout. (by the way, UVW is just another name for X,Y,Z but to avoid confusion with scene world co-ordinates they are called UVW when texture mapping). Select the Texture from the combo box roll out at the top right hand corner of the window. This will normally show a checkerboard image.
Step 10: Scale the texture to the object.
First select all the object polygons by dragging the mouse around the entire object and then select the Scale option button on the top of the window.

Use the Zoom mode or the mouse wheel to zoom in and out so that the entire object is visible with the entire texture.
When you place the mouse over the object a Triangle shaped cursor should appear. When this appears you drag up to the top left hand corner. The object will grow in relation to the texture material shown in the back ground.
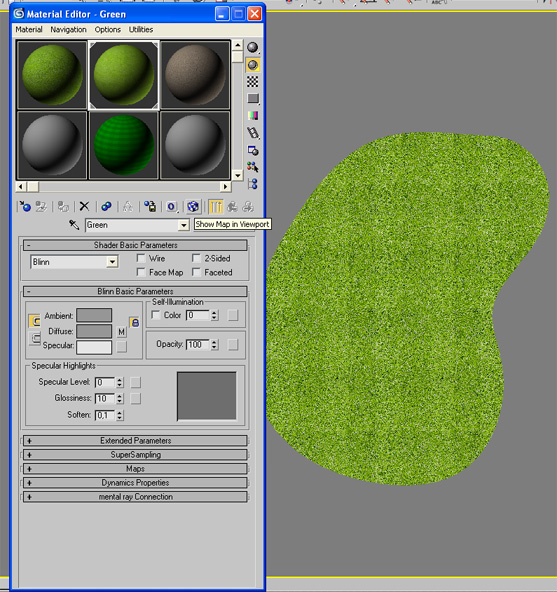
When doing this you can see the result of the scaling in the top viewport window if the Show Map in Viewport option is selected for the material in Material Editor (Key M). Click this option on in Material Editor for the active Material and, after closing the Material Editor, move the Edit UVWs window so that you see the result of the scaling in real time. (Note: To maximize a viewport window press the Maximize button in the far right of the bottom menu. Press again to reverse this action.)
You can use this method for all additional area textured objects such as bunkers, fairways etc.
Note:
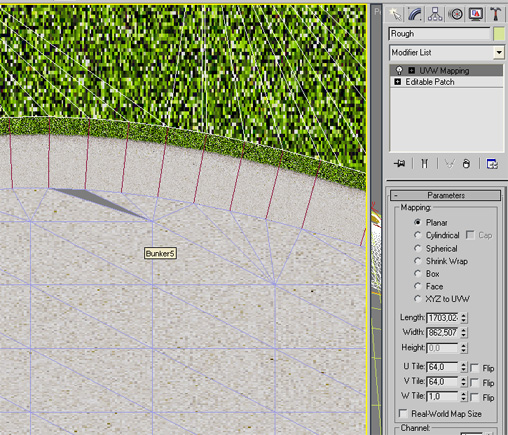
After texture mapping you may note gaps in the object ( as shown in the example above). This sometimes occurs during the Extrude and remove backfaces process.
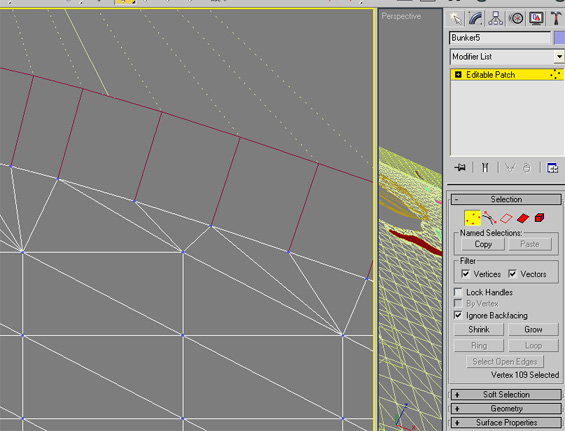
To correct the problem, select the Editable Patch (or Mesh) in the Modify section. Select the Vertex button and move the individual vertexes to close the gap.
Go to 3dsMax Tutorial Part 4 here
-
 Home
Home Sensors
 Cameras
 Software
 Enclosures
 GSA Courses
 E6 Courses
 Business
 Tech News